

How To Use Fit Cuffs

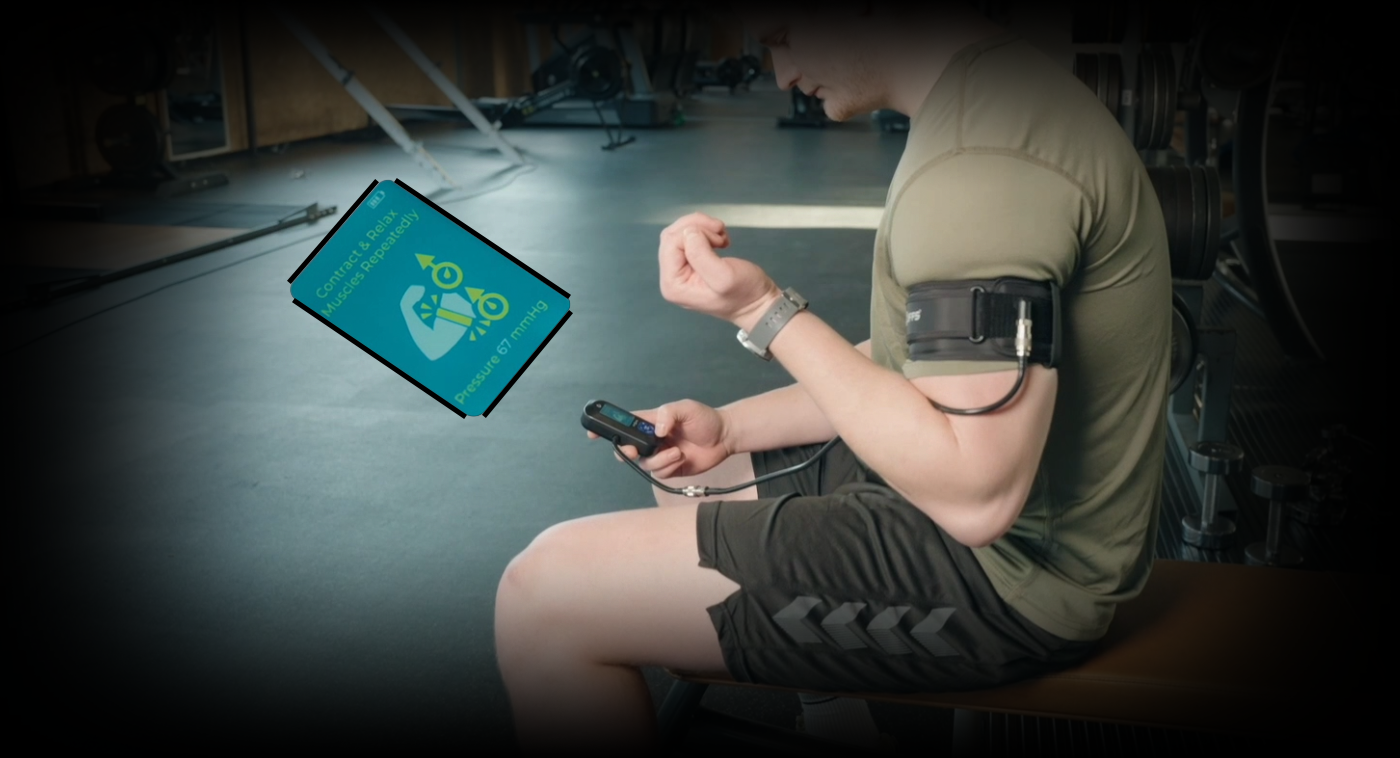
Pressure Calibration Using the BFR Unit Quick Inflation Feature

Deflation Plugs

Deflation Mode - Similar to the Pressure Calibration Mode
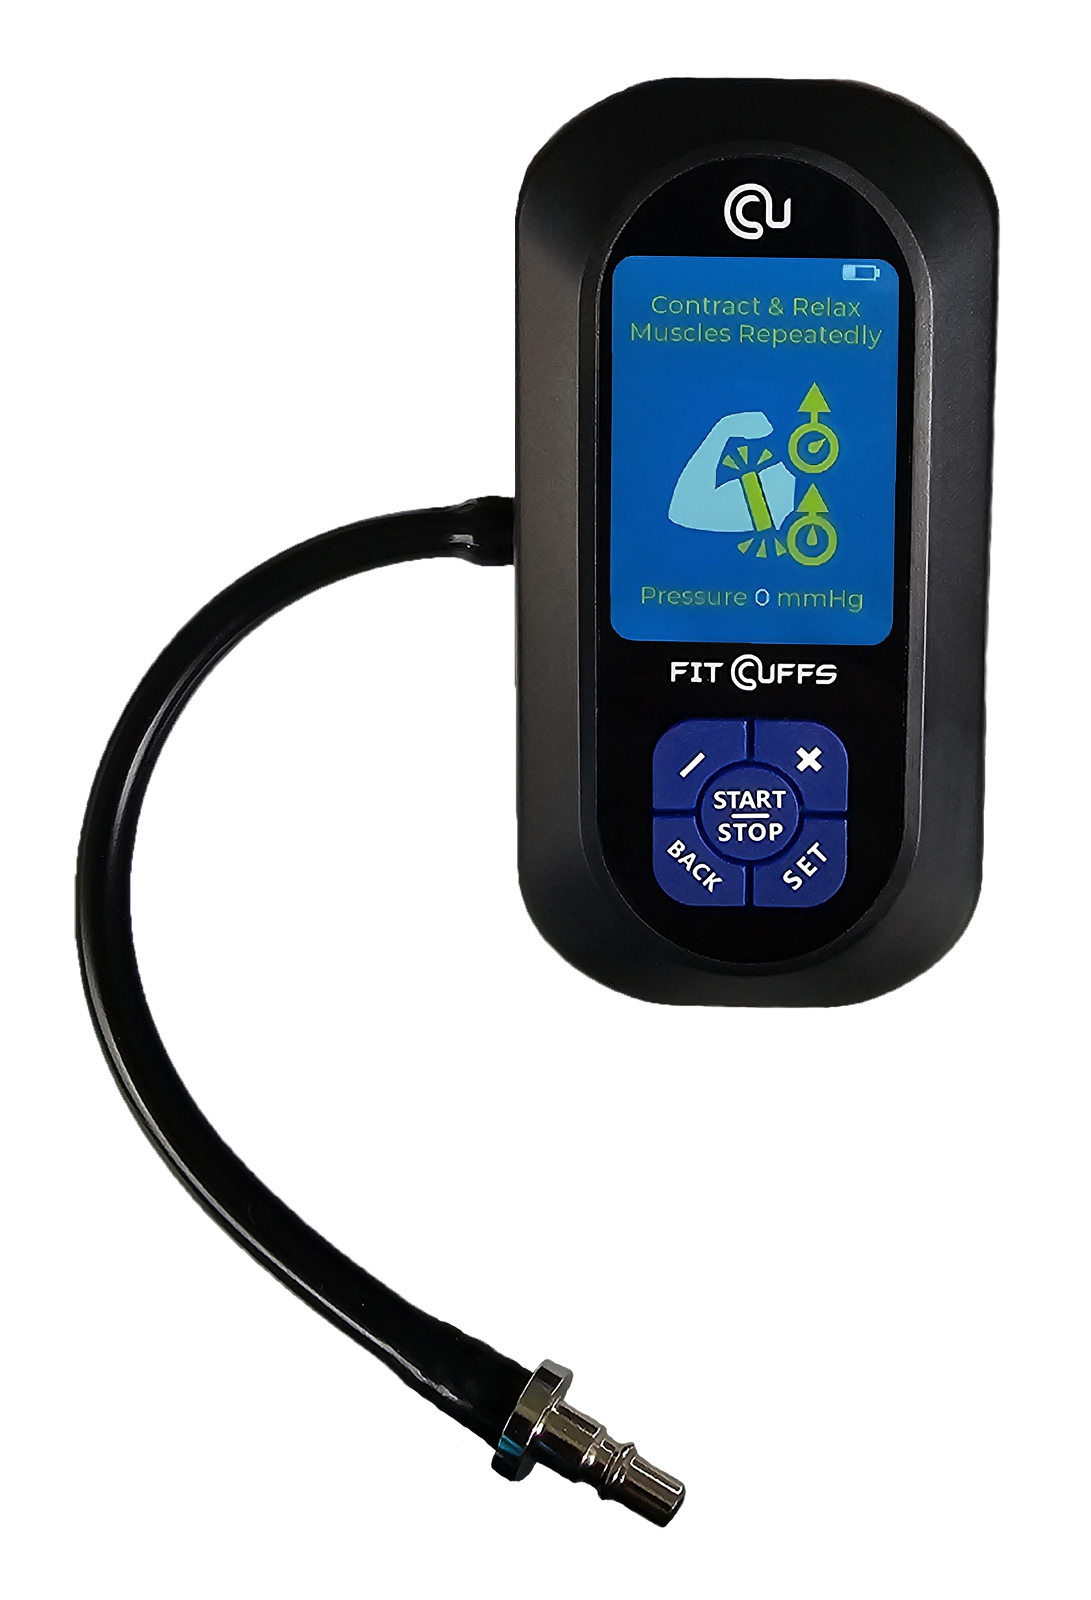
Pressure Calibration Mode as displayed on the BFR Unit
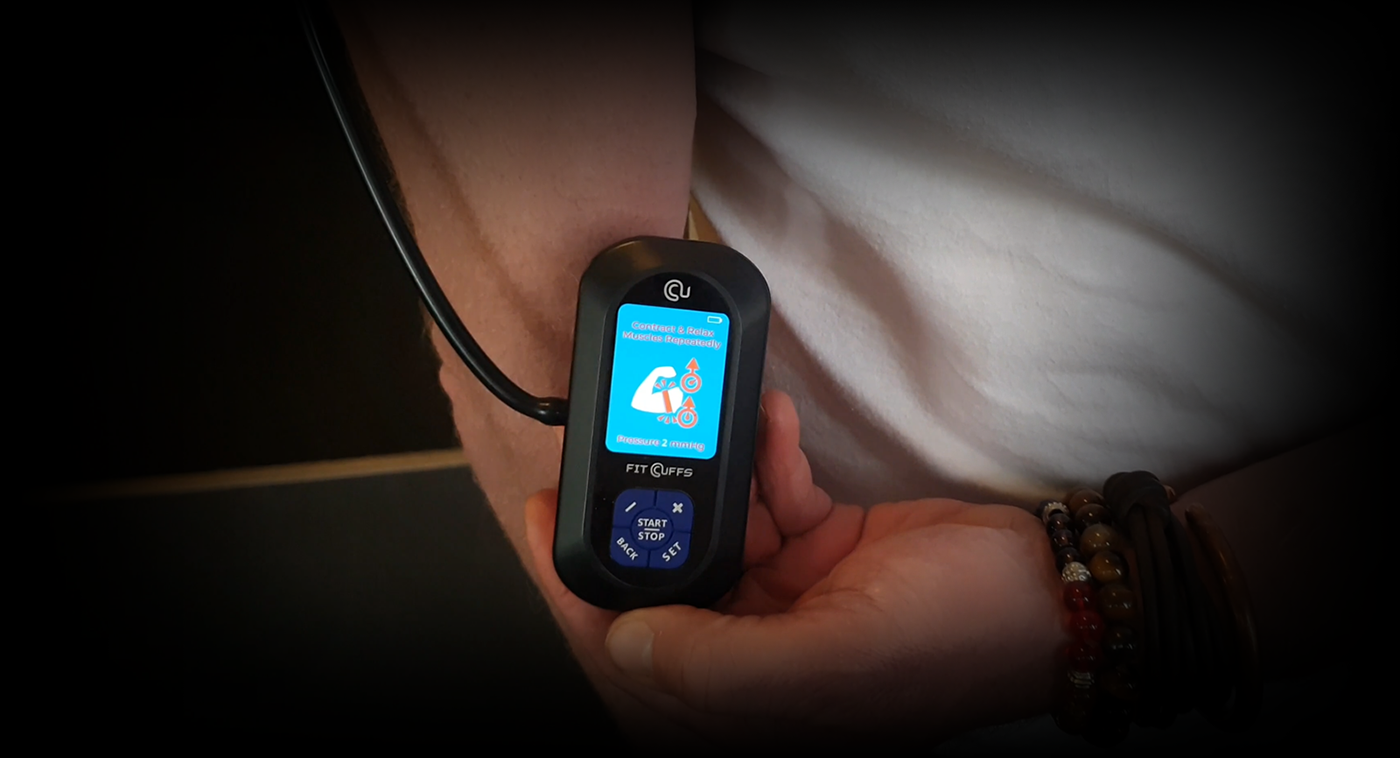
Deflation Mode - Similar to the Pressure Calibration Mode

Sufficient calibration is simply imperative to attenuate pressure drops during exercise
Check Below For How To Attach The Different Cuffs Accordingly
▼ Arm Cuff V4.0 & Leg Cuff V4.0 / V5.0 ▼
▼ Arm Cuff V3.1 & Leg Cuff V3.1 ▼

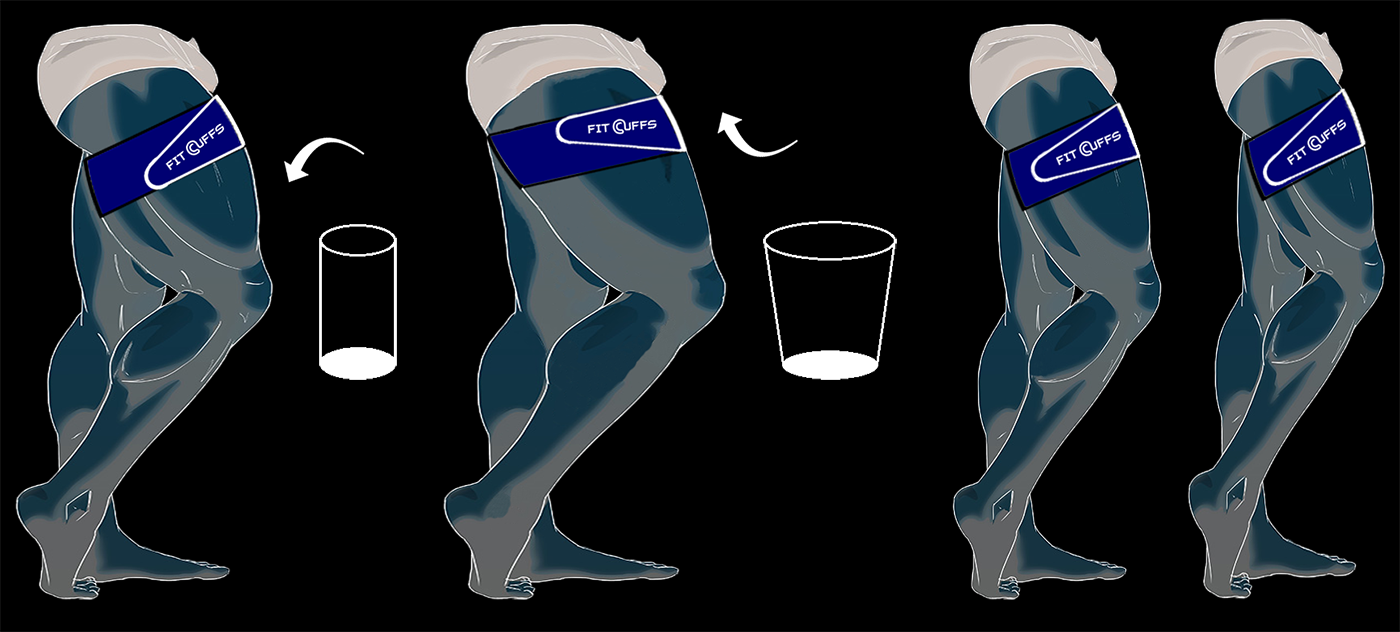
Check Below For How To Deflate the Cuffs

How much pressure (mmHg)? The Pressure-Load Continuum in Blood Flow Restriction Training

@Thehpm
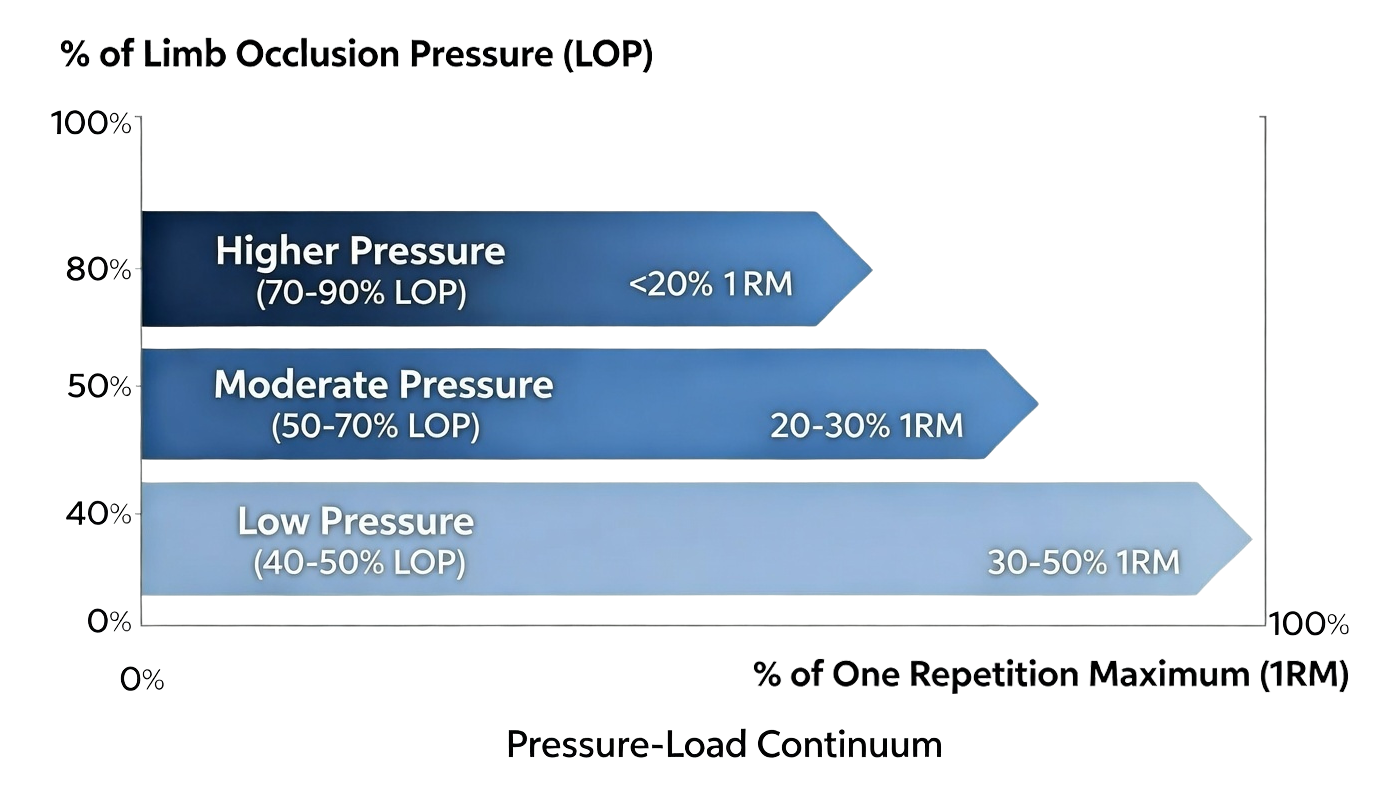
- Early Stage Rehab & Post-Op (<20% 1RM Load): It is strongly recommended to use higher relative pressures (70–90% LOP). This is a vital consideration for those with prescribed load restrictions following surgery.
- Gym & Performance (30–50% 1RM Load): In a standard gym setting without strict load restrictions, it is favorable to utilize less pressure (40–50/60% LOP) combined with higher relative loads.

Fig. 2 Illustration of a conceptual framework of exercise with blood fow restriction. The external load is determined by a variety of exercise
parameters, which also dictate the psychophysiological responses, and therefore, the internal load. The internal load in response to a specifc
external load depends on a multitude of infuencing factors (i.e., environmental and personal factors). The level of relative cuf pressure,
along with other variables, represents a modifable environmental factor to manipulate the internal load. Relative cuf pressures between 40
and 80% of the individuals’ arterial occlusion pressure are assumed to induce favorable long-term adaptations. Bielitzki et al. (2023)
Source
- Cerqueira et al. (2021) Repetition Failure Occurs Earlier During Low-Load Resistance Exercise With High But Not Low Blood Flow Restriction Pressures: A Systematic Review and Meta-analysis
- Pignanelli et al (2019) Low-load resistance training to task failure with and without blood flow restriction- Muscular functional and structural adaptations
- Bielitzki et al. (2023) The Discrepancy Between External and Internal LoadIntensity during Blood Flow Restriction Exercise Understanding Blood Flow Restriction Pressure as Modulating Factor
For different Training Protocols see How When & Why BFR & The Complete BFR Guide

Featured products
More than 6000+ units sold
-
Fit Cuffs | BFR Course | Complete
Original price was: 854 €.633 €Current price is: 633 €.➤ (Update 2024) Blood Flow Restriction – All 4 Courses One Major Package. +13 Module Online Video BFR Training Course by Dr. Nicholas Rolnick PT, MS, CSCS. Help more patients with BFR training & learn how to implement BFR Training safely and effectively with the 11.5 hour online BFR certification training course (11.75 total CEUs). Within 24-48 hours after purchase You will receive a link for the course. – Read more below
Included:
Fit Cuffs – Complete
➤ 2 x Leg Cuffs V5.0, V3.1 Or V4.0 (45-85 cm / 17.7-33.5 Inch)
➤ 2 x Arm Cuffs V3.1 Or V4.0 (20-50 cm / 7.9-20 Inch)
➤ Pressure Gauge
➤ 2 x Deflation Plugs + Measurement Tape
➤ (Optional) BFR Unit & Power Bank</p>
➤ Large Hard Carrying Case – dimensions tailored to accommodate contents -
Fit Cuffs | BFR Unit | Complete
Original price was: 713 €.445 €Current price is: 445 €.Includes
➤ 1 or 2 pcs. Fit Cuffs® BFR Unit V1.1 + Standard Length Tube (50cm / 19.6 Inch) (Basic) – Optional: in Hard Case + Long Tube (2 meter / 79 Inch)
➤ 2 x Leg Cuffs V4.0 (45-78 cm / 17.7-30.7 Inch) Black/Dark Blue And/Or Leg Cuffs V3.1 (45-85 cm / 17.7-33.5 Inch) Black/Dark Blue And/Or Leg Cuffs V5.0 (45-82 cm / 17.7-32.3 Inch) Black/Dark Blue
➤ 2 x Arm Cuffs V4.0 (20-50 cm / 7.9-20 Inch) Black/Dark Blue And/Or Arm Cuffs V3.1 (20-50 cm / 7.9-20 Inch) Black/Dark Blue
➤ 2 pcs. Deflation Plugs
➤ Optional: Velcro coated 20,000mAh – Power Bank® + Ultra-Compact charging cable(s)
➤ Optional: Wireless or Standard Pressure Gauge
➤ Standard Charging Cable (USB-A to USB-C) + 2 pcs. Deflation Plugs
➤ Large Hard Carrying Case – dimensions tailored to accommodate contents
➤ Access to the comprehensive User Manual for the BFR Unit -
Fit Cuffs | Complete
Original price was: 455 €.362 €Current price is: 362 €.Includes
➤2 x Leg Cuffs V5.0 (45-83 cm / 17.7-32.7 Inch) Black/Dark Blue And/Or 2 x Leg Cuffs V4.0 (45-80 cm / 17.7-31.5 Inch) Black/Dark Blue And/Or Leg Cuffs V3.1 (45-85 cm / 17.7-33.5 Inch) Black/Dark Blue
➤ 2 x Arm Cuffs V4.0 (20-50 cm / 7.9-20 Inch) Black/Dark Blue And/Or Arm Cuffs V3.1 (20-50 cm / 7.9-20 Inch) Black/Dark Blue
➤ Wireless Or Standard Pressure Gauge
➤ 2 pcs. Deflation Plugs + Measurement Tape
➤ Large Hard Carrying Case – dimensions tailored to accommodate contents -
Fit Cuffs | Complete x 2
Original price was: 704 €.570 €Current price is: 570 €.Includes
➤ 2 x Leg Cuffs V4.0 (45-80 cm / 17.7-31.5 Inch) Black/Dark Blue
And/Or
➤ 2 x Leg Cuffs V3.1 (45-85 cm / 17.7-33.5 Inch) Black/Dark Blue
And/Or
➤ 2 x Leg Cuffs V5.0 (45-82 cm / 17.7-32 Inch) Black/Dark Blue
➤ 2 x Arm Cuffs V4.0 (20-50 cm / 7.9-20 Inch) Black/Dark Blue
And/Or
➤ 2 x Arm Cuffs V3.1 (20-50 cm / 7.9-20 Inch) Black/Dark Blue
➤ 2 x Wireless or Standard Pressure Gauge
➤ 2 pcs. Deflation Plugs + Measurement Tape
➤ Large Hard Carrying Case – dimensions tailored to accommodate contents